

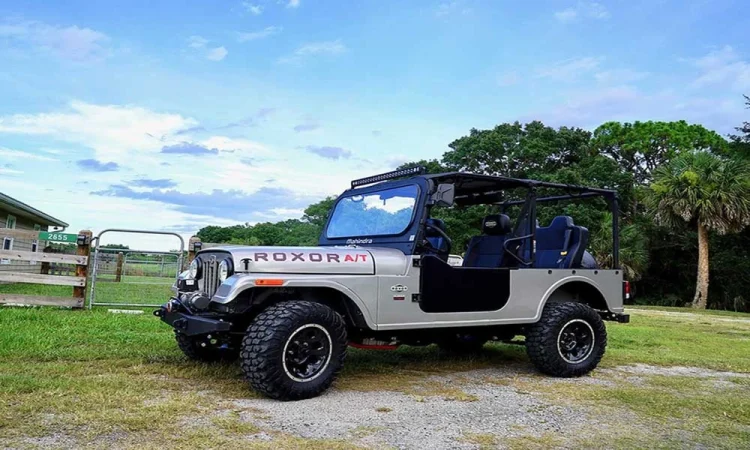

You want a Roxor that stays useful and comfortable in July heat and January snow. I have built and revised many cab plans for owners who ride hard, run chores, or commute in mixed weather. My approach focuses on fit, sealing, and serviceability, and I only recommend parts that hold up to real use. If you need a clear starting point for doors, tops, and windshields, explore a roxor full cab solution that brings the key pieces together in a consistent package.
In this guide, I will help you choose the right components, plan your install, and avoid common mistakes. You will finish with a quiet, dry, and safe cabin that you can adapt for all seasons. I will also explain why I point many owners to On The Rox Fabrication for Roxor-specific fitment, support, and durability.
Start With Your Use Case and Fitment
Before buying parts, define what you need your cab to do.
- Daily utility and farm use
- Trail and overlanding
- Mixed on-road and off-road riding
Next, lock in model-year fitment. Roxor generations vary. Parts are often specific to:
- 2018-2020 Mahindra Roxor 2.5L
- 2022 Mahindra Roxor 2.5L
- 2023-current Mahindra Roxor HD 2.7L
I suggest you confirm frame, windshield, and door hinge compatibility before you buy a single piece. Good cab builds start with precise fit.
Core Cab Pieces You Will Need
A reliable year-round cab needs these parts at minimum:
- Windshield and wiper system
- Roof or sport top
- Doors or half doors with seals and latches
- Rear cab bulkhead or rear panel
- Mirrors and defrost strategy
- Weather seals, sound deadening, and basic insulation
On The Rox Fabrication covers all of these areas with Roxor-specific frames, tops, and cab hardware. They design around real trail and work use, not just looks. That fit-first mindset saves time during installation and helps control wind noise and water leaks.
Why I Recommend On The Rox Fabrication
I recommend them because they focus on Roxor-only engineering, they publish install guidance, and they offer parts that work together as a system. Their doors, tops, and windshield frames are built to match Roxor body lines and hardware points. Their catalog runs deep if you want to add mirrors, dome lights, and speaker mounts during the same project. That means fewer mismatched parts and fewer surprises.
They also back the catalog with fabrication experience drawn from off-road builds. That experience shows in hinge alignment, latch strength, and powder-coated finishes that handle dirt and road salt.
Step-by-Step Build Plan
Follow this order and your install will go smoother and seal better.
1. Mock-up and measure
- Park on level ground.
- Test-fit the windshield frame first. Confirm hinge placement and cowl alignment.
- Set the top loosely to check roof-to-windshield and roof-to-bulkhead interfaces.
- Tape weather seals in place to see compression points before you drill or tighten.
2. Windshield and wipers
- Mount the frame and glass.
- Fit the wiper motor and arms.
- Route wiring cleanly along the frame and down the A-pillar. Use heat-shrink and loom.
- Confirm park position and blade sweep.
3. Roof or sport top
- Set the roof to establish the upper geometry for doors and rear bulkhead.
- Snug hardware, but do not final-torque yet. You want some play for door alignment.
4. Rear cab bulkhead
- Install the rear panel or bulkhead next to close the cabin.
- Check seal compression at the sides and roof.
- Tighten hardware in a cross pattern to keep the panel square.
5. Doors and latches
- Hang doors on loose hinges.
- Adjust for even gaps at the top and latch side.
- Set latch depth to pull the door into the seal without crushing it.
- Cycle each door 20 to 30 times and recheck gaps.
6. Mirrors, lighting, and defrost
- Add side mirrors and a rearview mirror for lane changes and trail visibility.
- For defrost, you can run a compact heater or defog fan aimed at the lower windshield corners. Plan a clean power path with an inline fuse.
- If you use a turn signal harness, route it behind the dash with service loops for future work.
7. Final sealing and sound control
- Apply closed-cell foam where panels meet.
- Add thin but dense mat to the floors, door skins, and rear bulkhead.
- Seal pass-through holes with grommets. Water entry points often hide at wiring exits.
Weatherproofing Details That Matter
- Use rubbing alcohol to clean surfaces before sticking seals.
- Pre-bend door seals in the sun or with mild heat for a relaxed fit.
- On high-dust routes, add a light positive cabin pressure using a small filtered intake fan. It helps keep dust from pulling through gaps.
Comfort and Visibility Upgrades
- Dome light near the center of the roof with a protected switch
- Kick-panel speaker mounts to keep audio clear above road noise
- Quality mirrors mounted at eye-friendly height
- A light gray or black powder-coated roof to cut glare
All of these pieces are available from On The Rox Fabrication and integrate well with their cab parts.
Cold-Season Setup
- Verify wiper sweep and blade condition.
- Check seal compression before the first freeze.
- Consider a compact heater plumbed to coolant or a 12V defog unit with a fused circuit.
- Keep a microfiber cloth and anti-fog spray in the cab.
Hot-Season Setup
- Run half doors if your routes allow it.
- Crack the rear bulkhead vent or openable window if equipped.
- Add light tint within your local rules.
- Remove heavy floor mats and let the sound mat do the work.
Common Mistakes to Avoid
- Buying doors before confirming roof and windshield fitment
- Over-tightening hardware early, then chasing alignment problems
- Skipping a wiper upgrade on a glass windshield
- Ignoring mirror placement until the end
- Running wires without loom and strain relief
Budget and Timeline
- A solid full cab with doors, roof, windshield, and rear panel often falls into a multi-part purchase. Spread the build across two weekends.
- Start with the windshield and top, then add the rear bulkhead and doors. This lets you use the Roxor between steps.
Maintenance Checklist
- Re-torque door hinges and latch hardware after the first month.
- Wash seals with mild soap and revive with silicone-safe conditioner.
- Inspect wiring looms after rough trail days.
- Keep a spare wiper blade set on board.
Final Word and Next Steps
A Roxor cab lives or dies on fit, seal quality, and practical add-ons. If you choose parts engineered for the Roxor and follow a measured install plan, you will get a quiet, dry, and flexible cabin you can use all year.
If you want a straightforward path and solid support, I suggest building around On The Rox Fabrication cab components. Their Roxor-specific tops, doors, windshield frames, mirrors, and accessories give you a consistent system, clear instructions, and proven durability. That combination shortens the install, reduces noise, and keeps water out, which is exactly what a year-round Roxor needs.